How to Program a Garage Door Remote: Step-by-Step Guide
Whether you bought a new remote, replaced a battery, or just moved into a new home, programming your garage door remote is usually a quick, five-minute job. Here is how to do it for every major brand.
In This Article
Quick Summary
For most openers: press the "learn" button on the motor unit, then press and hold the button on your remote within 30 seconds. The opener light will blink to confirm. LiftMaster, Chamberlain, and Genie all use this basic approach with minor variations.
Before You Start
You will need two things: a ladder (the learn button is on the motor unit mounted on your ceiling) and the remote you want to program. Make sure the remote has a fresh battery — a CR2032 coin cell for most models. If you just replaced the battery and the remote still does not work, the issue might be the remote itself rather than the programming.
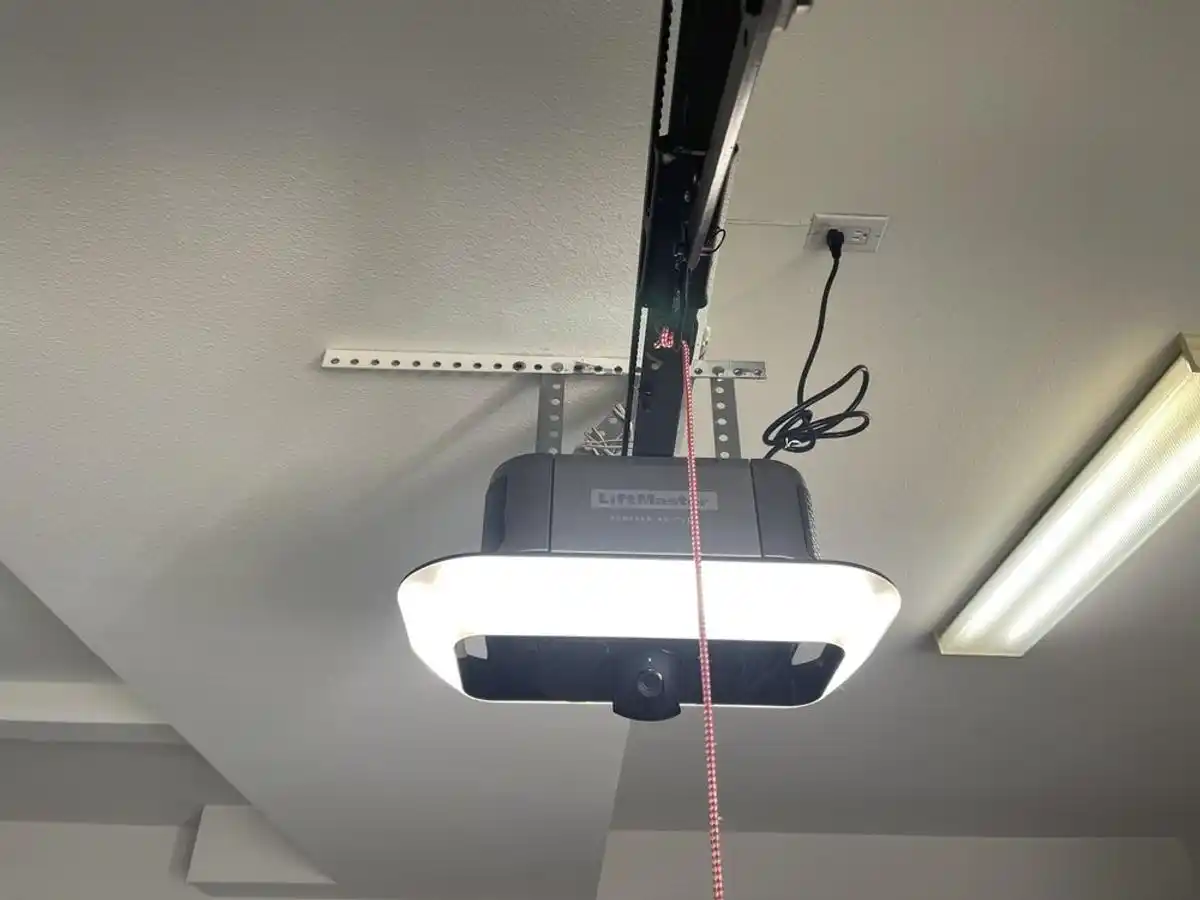
Also identify your opener brand and model. The brand name is printed on the front of the motor unit. The model number is usually on a label on the side or back. Knowing this helps you find the learn button, which is in a different location depending on the brand and generation.
One more tip: keep all other remotes away from the opener during programming. If someone accidentally presses another remote while you are in pairing mode, it can interfere with the process. And if you are programming a remote for a new home, we recommend clearing all existing codes first (instructions below) so previous owners no longer have access.
Programming a LiftMaster or Chamberlain Remote
LiftMaster and Chamberlain are made by the same parent company (Chamberlain Group), so the programming process is identical for both brands. These are the most common openers we install throughout the Bay Area, and the ones we see most often during opener installation and service calls. If you are not sure which brand you have, check out our LiftMaster vs Chamberlain comparison.
Identifying Your Learn Button Color
The color of the learn button on your LiftMaster or Chamberlain opener tells you what technology generation it uses. This matters because the button-press timing differs slightly between generations:
- Yellow learn button: Security+ 2.0 (models made 2011 and later). This is the most common type we see in Bay Area homes. Compatible remotes include the 893LM, 893MAX, and 891LM.
- Purple learn button: Security+ 2.0 with MyQ (2013+). Same programming process as yellow. Compatible with 893LM, 890MAX, and MyQ-enabled remotes.
- Orange learn button: Security+ (2005–2011). Compatible remotes include the 971LM and 973LM.
- Red/green learn button: Older Security+ or basic models (pre-2005). Uses 390 MHz frequency. Compatible with 371LM and 373LM remotes.
Step-by-Step: LiftMaster / Chamberlain Programming
- Climb the ladder and locate the learn button on the back or side of the motor unit. There will be a small LED next to it.
- Press and release the learn button. The LED will light up — you now have about 30 seconds to complete the next step.
- Go to your remote and press and hold the button you want to program until the opener light on the ceiling blinks or you hear two clicks. This confirms the remote has been paired.
- Test it. Press the remote button — the door should respond. Press it again to make sure it consistently works.
If you have a newer LiftMaster with myQ built-in (models 87504, 84505R, or the wall-mount 8500W), you can also add the remote through the myQ app under "Devices," though the physical learn-button method still works and is usually faster.
Erasing All Remotes on LiftMaster / Chamberlain
To clear every remote and keypad from a LiftMaster or Chamberlain opener, press and hold the learn button for about 6 seconds until the LED turns off. This is a full reset — you will need to reprogram every device you want to keep. This is especially useful when moving into a new home or if you suspect someone has unauthorized access.
Programming a Genie Remote
Genie openers use a similar learn-button approach, but Genie calls theirs the "program set" button or simply the "learn code" button. It is typically located on the back of the motor unit near the antenna wire.
Genie Intellicode Models (1997 and Later)
Most Genie openers sold since 1997 use Intellicode rolling-code technology, which changes the access code with every use to prevent code theft. Here is how to program a remote for these models:
- Press and release the program/learn button on the Genie motor unit. The indicator LED will start blinking.
- Within 30 seconds, press and hold the desired button on your Genie remote until the opener light flashes or the motor unit clicks.
- Test the remote from inside the garage first, then from outside at normal range (your driveway).
Common Genie Intellicode remotes include the G1T-BX (single-button), G3T-BX (three-button), and the GM3T-BX mini remote.
Older Genie DIP Switch Models (Pre-1997)
Older Genie openers use DIP switches instead of a learn button. If your opener has a row of small toggle switches (usually 8 to 12 of them), you need to match the switch positions on the remote to those on the opener. Flip each switch on the remote to match the up/down pattern on the opener exactly. These older systems use a fixed code and are less secure than Intellicode. If you still have a DIP-switch opener, it may be time to consider an opener upgrade for both security and reliability.
Erasing All Remotes on Genie
To clear all programmed devices from a Genie Intellicode opener, press and hold the program button for approximately 10 seconds until the LED stops blinking. All remotes and keypads will be erased and must be reprogrammed individually.
Programming a Craftsman Remote
Craftsman garage door openers were sold through Sears for decades and remain common in older Bay Area homes. Depending on the age of your Craftsman opener, the internals were actually manufactured by either Chamberlain Group or Genie, which means the programming process follows one of those two approaches.
Craftsman Openers with a Learn Button (2000s and Later)
Most Craftsman openers from the 2000s onward were made by Chamberlain and have a learn button, typically green, purple, or yellow. The process is identical to LiftMaster:
- Locate the learn button on the motor unit. On Craftsman openers, it is usually on the back panel near the light bulb socket.
- Press and release the learn button. The LED indicator will illuminate.
- Within 30 seconds, press and hold the button on your Craftsman remote until the opener light blinks to confirm pairing.
- Test the remote from both inside and outside the garage.
Compatible Craftsman remotes include the 139.53753, 139.53879, and the 315 MHz and 390 MHz series. If your Craftsman remote has stopped working and you cannot find an exact replacement, a Chamberlain-compatible universal remote will usually work.
Older Craftsman Openers with DIP Switches
Craftsman openers from the 1990s and earlier often use DIP switches. Open the back cover of the motor unit and the remote to access the switches. Set all switches on the remote to match the pattern on the opener. There are typically 8 or 12 switches, and each must be in the same position (up or down) on both the opener and the remote.
Programming a Linear or Mega Code Remote
Linear (now part of Nortek) makes commercial and residential openers that are popular in Bay Area apartment complexes, condos, and gated communities. Their remotes use a system called Mega Code.
Linear Mega Code Programming
- On the Linear receiver or opener, locate the program button. It is usually a small recessed button labeled "PROGRAM" or "CODE."
- Press the program button once. The LED will illuminate or begin blinking.
- Within 30 seconds, press and hold the button on your Linear remote (such as the MCT-1, MCT-2, or MCT-3) until the opener LED flashes to confirm.
- Test the remote to verify it operates the door or gate.
Linear Multi-Code remotes (older models) use DIP switches with 10 positions. If your system uses Multi-Code, match all 10 switches between the remote and receiver. For community gate systems managed by an HOA, you may need to contact your property management to have your remote frequency added to the receiver — individual residents typically cannot program gate remotes themselves.
Programming a Universal Garage Door Remote
Universal remotes are designed to work across multiple opener brands, making them a convenient choice if you have more than one garage door or if you cannot find a brand-specific replacement remote. Here are the most popular universal remotes and how to program each one.
Chamberlain KLIK5U / Clicker Universal Remote
The Chamberlain KLIK5U (sold under the "Clicker" brand) is the most widely available universal remote and works with most major opener brands including LiftMaster, Chamberlain, Genie, Craftsman, and Linear.
- Press and hold the top and bottom buttons on the KLIK5U simultaneously until the LED blinks. This puts it into programming mode.
- Select the brand of your opener by pressing the corresponding button. Refer to the brand code chart in the instruction booklet or on the back of the remote. For LiftMaster/Chamberlain, press the button once. For Genie, press it twice. For other brands, check the chart.
- Press the learn button on your opener motor unit.
- Within 30 seconds, press and hold the button on the KLIK5U that you want to use until the opener light flashes to confirm.
- Test the remote.
Genie GIRUD-1T Universal Remote
The Genie GIRUD-1T is a dual-frequency (315 MHz and 390 MHz) universal remote that works with both Genie and non-Genie openers.
- Set the frequency switch on the back of the remote to match your opener (315 MHz for most newer openers, 390 MHz for some older models).
- Press the learn button on your opener motor unit.
- Within 30 seconds, press and hold the desired button on the GIRUD-1T until the opener responds with a click or light flash.
- Test from inside and outside the garage.
Tips for All Universal Remotes
If you are having trouble pairing a universal remote, double-check the frequency. Most openers built after 2004 use 315 MHz, while many older units use 390 MHz. The frequency is usually printed on the back of the motor unit near the model number. Also note that some newer openers with proprietary encryption (like LiftMaster Security+ 2.0) may require a brand-specific remote and will not pair with a basic universal model.
Programming a Wireless Keypad
Wireless keypads mount on the wall outside your garage and let you open the door by entering a PIN code. They are useful for getting into the garage without a remote — after a jog, when the kids come home from school, or when you need to let a contractor in. Programming one is similar to a remote:
- Press the learn button on the opener motor unit.
- Within 30 seconds, enter your desired PIN on the keypad (typically 4 digits), then press the enter or send button.
- The opener light should blink to confirm pairing.
- Test the code by entering your PIN and pressing enter. The door should move.
Choose a PIN that is not obvious — avoid 1234, your house number, or your birth year. Change it every year or two, especially if you have given the code to contractors, dog walkers, or neighbors you no longer need to have access.
If the keypad is unresponsive, check the battery (most keypads use a 9-volt or CR2032). Also make sure the keypad is compatible with your opener. LiftMaster keypads (like the 877MAX) work with LiftMaster and Chamberlain openers. Genie keypads (like the GK-R) work only with Genie openers. There are also universal keypads available if you need cross-brand compatibility.
Programming Your Car's Built-In HomeLink or Car2U Buttons
Many vehicles sold in the Bay Area come with built-in garage door buttons — most commonly HomeLink or Car2U. These are the three buttons typically found in the visor, rearview mirror, or overhead console. Programming them takes a few extra steps compared to a standard remote because of the rolling-code handshake required by modern openers.
HomeLink Programming (Most Common)
HomeLink is the most widely used in-car garage door system, found in vehicles from Toyota, Honda, BMW, Ford, Chevrolet, Tesla, and many others. Here is the step-by-step process:
- Clear old codes: Hold the first and third HomeLink buttons simultaneously for about 20 seconds until the LED starts blinking rapidly. This erases any previously programmed codes.
- Train the signal: Hold your working garage door remote about one to three inches from the HomeLink button you want to program. Simultaneously press and hold both the remote button and the HomeLink button. Wait until the HomeLink LED changes from a slow blink to either a solid light or a rapid blink. This may take 10 to 30 seconds.
- Complete the rolling-code handshake: This step is required for any opener with rolling-code security (LiftMaster Security+ 2.0, Genie Intellicode, etc.). Go to the opener motor unit and press the learn button. Then return to the car within 30 seconds and press the programmed HomeLink button two to three times in quick succession. The opener should respond.
- Test: Press the HomeLink button. The door should open. Press it again to close. If the door does not respond, repeat step 3 — the timing can be tricky and sometimes takes two or three attempts.
Car2U Programming
Car2U is found in some older vehicles from General Motors, including certain Cadillac, Buick, and Chevrolet models. The process is similar to HomeLink:
- Press and hold the two outer Car2U buttons for about 20 seconds to clear old codes.
- Hold your remote near the Car2U button and press both simultaneously until the Car2U indicator changes.
- Press the learn button on the opener, then return to the car and press the Car2U button within 30 seconds.
- Test the button to confirm the door responds.
Tips for Car Remote Programming
The most common reason HomeLink fails to pair is timing. The rolling-code handshake in step 3 has a strict 30-second window, and you need to get back to the car and press the button quickly. If your garage is attached to your home, consider having a helper press the learn button on the opener while you stay in the car. If you drive a Tesla, the HomeLink setup is handled through the touchscreen under Controls > HomeLink — the screen will walk you through each step. For specific vehicle instructions, check your owner's manual or the HomeLink support site.
Troubleshooting Common Problems
If the programming process did not work, or if your remote was working and suddenly stopped, here are the most common issues and how to fix them.
Remote Will Not Program
- Expired window: You only have about 30 seconds after pressing the learn button. If you moved too slowly, start over.
- Weak battery: A dying battery may have enough power to light the remote's LED but not enough signal strength to reach the opener. Swap it for a fresh one.
- Too far away: During programming, hold the remote within a few feet of the opener unit. Range will be normal after pairing.
- Memory full: If the opener already has the maximum number of devices paired, it will not accept another. Clear all devices (hold the learn button for 6+ seconds on LiftMaster/Chamberlain, or 10 seconds on Genie) and reprogram from scratch.
- Incompatible remote: Not all remotes work with all openers. LiftMaster Security+ 2.0 remotes will not pair with a Genie Intellicode opener and vice versa. Make sure the remote matches your opener brand and frequency.
Remote Works Intermittently
- Low battery: The first symptom of a dying remote battery is reduced range. You might notice the remote works from the driveway but not from the street. Replace the battery before doing anything else.
- Antenna issue: The opener's antenna is the short wire hanging from the motor unit. If it has been pushed up, cut short, or wrapped around something, the signal range drops significantly. Make sure the antenna hangs straight down and is not obstructed by metal objects.
- LED bulb interference: Certain LED light bulbs installed in the opener can emit radio frequency interference that disrupts the remote signal. If the problem started after you changed the light bulb, try switching back to an incandescent bulb or use a bulb specifically designed for garage door openers (LiftMaster sells one).
- Nearby frequency interference: New electronics in or near your garage — like a Wi-Fi router, baby monitor, or amateur radio equipment — can interfere with the 315 MHz or 390 MHz signal your remote uses. Try unplugging nearby devices to isolate the source.
Remote Lost Range
- Battery: Again, the most common cause. A remote with a fresh battery should work from 20 to 50 feet away.
- Antenna: Verify the opener's antenna wire is hanging freely. Some homeowners accidentally tuck it up during cleaning or holiday decorating.
- Sunlight and temperature: In rare cases, extreme heat can affect remote electronics. If you leave your remote on the dashboard in direct sunlight, the circuit board can degrade over time.
Need to Reprogram After a Power Outage
Most modern openers (LiftMaster, Chamberlain, Genie) retain their programmed remote codes through power outages — they store codes in non-volatile memory. If your remote stopped working after a power outage, the issue is more likely:
- A power surge damaged the opener's logic board. Try the wall button — if it also does not work, the logic board may need replacement.
- The opener needs to complete a power-up cycle. Unplug the opener for 30 seconds, plug it back in, and wait for it to fully initialize before testing the remote.
- California law (SB 969) now requires battery backup on new openers sold in the state. If you experience frequent power outages in your area, a battery backup opener ensures your garage door always works.
When to Call a Professional
Programming a remote is a straightforward DIY task in most cases. But there are situations where the problem goes beyond the remote itself, and calling a professional will save you time and frustration.
Signs the Problem Is Not the Remote
- No response from any device: If the opener does not respond to any remote, the wall button, or a keypad, the problem is the opener itself — likely the logic board, transformer, or wiring.
- Opener makes a clicking sound but the door does not move: This usually indicates a stripped gear, broken spring, or disconnected trolley — not a remote issue. See our maintenance checklist for common mechanical problems.
- The learn button LED does not light up: If pressing the learn button produces no LED response, the circuit board in the opener may be dead. This requires professional diagnosis and likely a board replacement.
- Persistent frequency interference: If you have eliminated all obvious sources of RF interference and the remote still has poor range, a technician can test the opener's receiver and antenna with diagnostic equipment.
Other Reasons to Call a Pro
- You have an older opener with DIP switches and cannot find the switch panel or manual.
- You want to upgrade to a new opener with built-in Wi-Fi, myQ, or battery backup. We handle opener installation daily throughout the Bay Area and can set up all your remotes and keypads as part of the install.
- You just moved into a new home and want to clear all previous codes and set up fresh remotes for security purposes.
- You are dealing with a commercial opener or a community gate system that requires professional configuration.
Need help with your opener or remote? If you have tried these steps and the remote still will not program, give us a call at (888) 485-6995 or request a free estimate online. We troubleshoot and repair all major opener brands — LiftMaster, Chamberlain, Genie, Craftsman, Linear, and more. Same-day service available across the Bay Area.
Frequently Asked Questions
How do I reset my garage door remote?
To reset a garage door remote, you need to clear its programming from the opener and then re-pair it. On LiftMaster and Chamberlain openers, press and hold the learn button for 6 seconds until the LED turns off — this erases all remotes. On Genie openers, hold the program button for about 10 seconds. After clearing, follow the standard programming steps for your brand to pair the remote again. Note that clearing erases all devices, not just one, so you will need to reprogram every remote and keypad.
Can I program multiple remotes to one garage door opener?
Yes. Most modern openers support multiple remotes. LiftMaster and Chamberlain openers with Security+ 2.0 typically support up to 8 remotes, keypads, and myQ devices combined. Genie Intellicode openers support up to 12 devices. To add a second remote, just repeat the programming process — press the learn button on the opener, then press the button on the new remote. Each remote is programmed individually and each one takes the learn-button-then-remote sequence.
Why did my garage door remote stop working?
The most common reason is a dead or weak battery. Try replacing the battery first — it solves the problem about 70% of the time. Other causes include: the opener's antenna is damaged or obstructed, an LED light bulb in the opener is creating radio interference, or the opener's logic board has failed. If the wall button still works but the remote does not, the issue is almost certainly the remote or its battery. If nothing works — no remote, no wall button, no keypad — the problem is the opener itself.
Why is my garage door remote not working after programming?
The most common reason is that the 30-second programming window expired before you pressed the remote button. Start over: press the learn button on the opener until the LED lights up, then press and hold the remote button within 30 seconds. Also make sure the remote battery is fresh — a weak battery can have enough power to light up the remote LED but not enough to transmit a strong signal to the opener.
Can I program a universal remote to work with my garage door opener?
Yes, most universal remotes (like the Chamberlain KLIK5U or Genie GIRUD-1T) work with the majority of garage door openers made after 1993. The programming process is similar — you press the learn button on the opener, then press the button on the universal remote. Check the universal remote's instructions for your specific opener brand, as the button-press sequence can vary slightly. Note that some openers with proprietary encryption may require a brand-specific remote.
How do I program a garage door remote for my car?
Most cars with built-in garage buttons use the HomeLink system. First, clear old codes by holding the two outer HomeLink buttons for 20 seconds. Then hold your existing remote near the HomeLink button and press both simultaneously until the LED changes. Finally, press the learn button on your opener, return to the car, and press the HomeLink button two to three times within 30 seconds. See our detailed HomeLink programming section above for the full walkthrough.
Do I need to reprogram my garage door remote after a power outage?
Usually not. Modern openers from LiftMaster, Chamberlain, and Genie store remote codes in non-volatile memory that survives power outages. If your remote stopped working after an outage, the issue is more likely a power surge that damaged the opener's logic board, or the opener simply needs to be unplugged for 30 seconds and plugged back in to reset. If the wall button also does not work after an outage, call a technician to check the opener's electronics.
What frequency does my garage door remote use?
Most garage door remotes sold after 2004 operate on 315 MHz. Many older remotes (pre-2004) use 390 MHz. Some very old models use 300 MHz or 310 MHz. The frequency is usually printed on the back of the remote and on a label on the opener motor unit. When buying a replacement remote, matching the frequency to your opener is essential — a 315 MHz remote will not work with a 390 MHz opener.
Related Articles
Serving the Entire Bay Area
Integrity Garage Doors & Gates provides expert service across the San Francisco Bay Area. Find your local service area:
Hayward • Oakland • Fremont • San Jose • San Francisco • Concord • Walnut Creek • Dublin • Pleasanton • Castro Valley • San Leandro • Danville • San Ramon • Palo Alto • Mountain View • Berkeley • San Mateo • Redwood City • Livermore • All Locations →
Need Help With Your Garage Door Opener?
From remote programming to full opener replacement, we handle it all. Call us for fast, knowledgeable service across the Bay Area.